Revolutionize your 360 Photo Booth Business with Snappic’s Epic
VideoFX Builder
They say that a picture is worth a thousand words… Well if that’s the case, then these days videos are worth millions!

People love videos.
That’s the bottom line. We’ve seen it with the epic rise of TikTok, the ever-growing popularity of YouTube, and Instagram’s switch from a photo-sharing platform to reels, reels, reels!
In the photo booth industry, we’ve seen this shift with the dramatic rise and subsequent popularity of 360 booths.
360 booth videos are shared across social platforms like wildfire. It’s a fun and engaging way for people to express themselves, and share a unique experience from the events they attend.
Are you taking advantage of this trend in your business?
As a photo booth owner, it’s time to jump onto the 360 bandwagon if you haven’t already. But where to start? Check out this handy article from the team at Snappic to see how to get started with a 360 booth.
Snappic is the industry’s leading photo booth software company, and they have created a powerful video builder within their app that will revolutionize your booth’s video output.
Let’s take a deep dive into Snappic’s epic VideoFX builder, and what it can do for your 360 photo booth business.
Creating Epic Videos with Snappic’s VideoFX Builder
Producing captivating video content starts with a powerful and easy-to-use video editor. The Snappic devs have spent a lot of time perfecting their VideoFX builder so that users can let their imaginations run wild, and use the video editor to put together complex or simple video activations.
Snappic provides two options when setting up a video template. You can choose from a range of pre-designed templates from their template library (which you can edit or use as is), or you can create your own video template. Let’s take a look at building your own video template first.
The builder is divided into three sections for editing the different aspects of your videos:
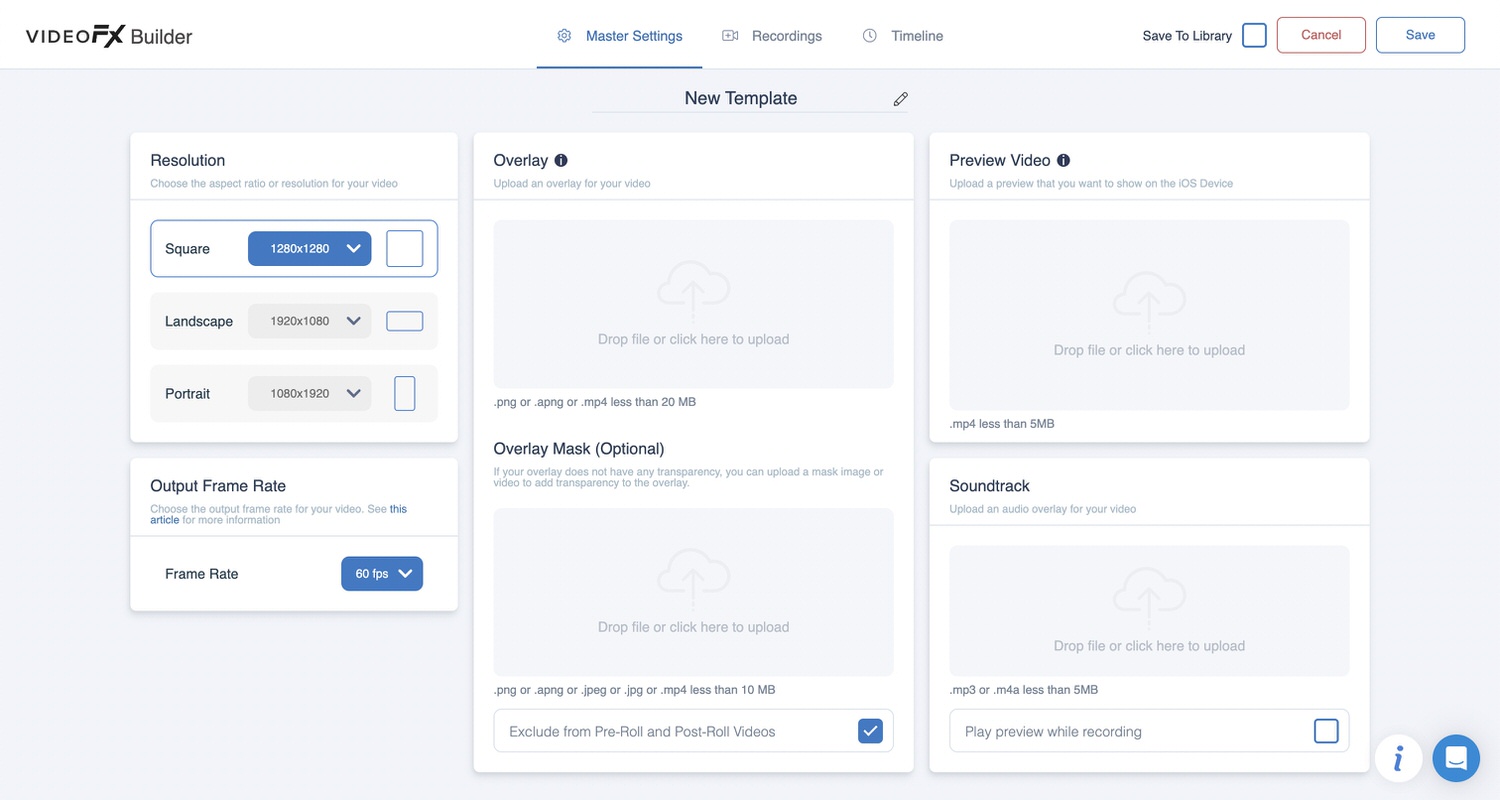
Master Settings
This section tells the app how many videos it needs to record for the specific template you are setting up. For most 360 videos, you would just need to set up one recording.
If you are creating more complex videos, you might need to add more recordings.
For each recording, you can configure the following:
Countdown Text
Here you can specify what text you would like displayed on the recording device while the countdown happens. This is handy when you want to give your guests specific instructions, like “Get ready to dance” or “Shake it up!”.
Countdown Interval
Here you can specify how long you want the countdown to be before the recording starts. Selecting “Auto Start” will start the recording as soon as you start the recording on the app.
Timeline
Recording Duration
Here is where you set how long you want the app to record for. Please take note that this is not how long the final video output will be.
With most 360 videos, anywhere between 5 and 8 seconds is recommended, as you can then use effects such as slo-mo, speed ramp and speed reverse to turn those 5 seconds into a 15-20 second video clip.
This is where the real magic happens!
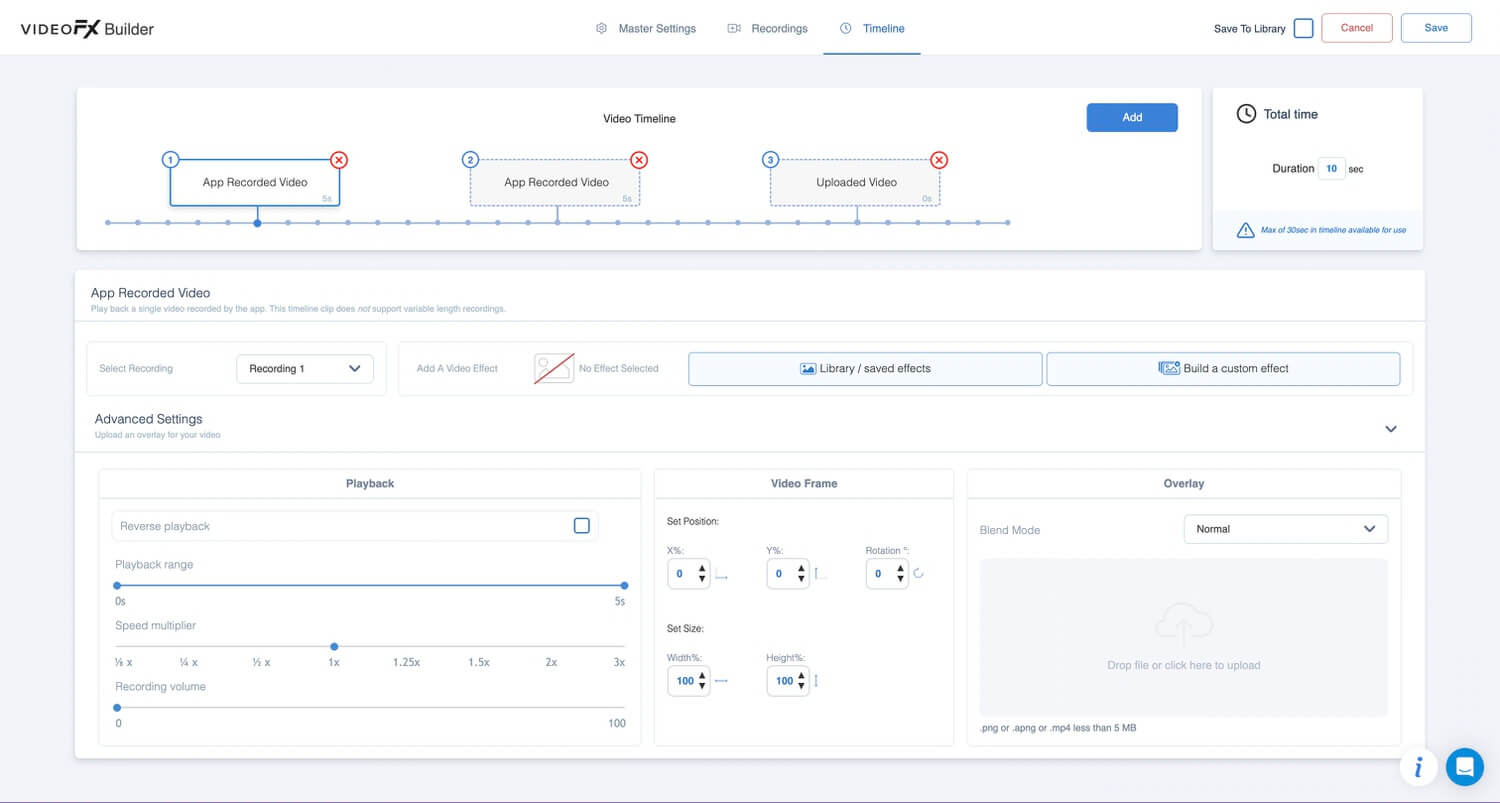
The timeline is your roadmap to an awesome 360 video. Here you can specify how your clips are joined together, what effects are added to each clip, and the duration of each clip. This is also where you can add your intro and outro videos if you are using them in your video.
In the right-hand corner, you can click “add” to specify what kind of recording you want to start within your timeline. You can choose between:
- App Recorded Video
- Confessional
- Four Up
- Freeze Frame
- Three Up
- Uploaded Video (this will allow you to add intro/outro videos)
For 360 videos, you would generally add the App Recorded Video. This is the video that is recorded by the device for the duration that you previously specified under recording duration.
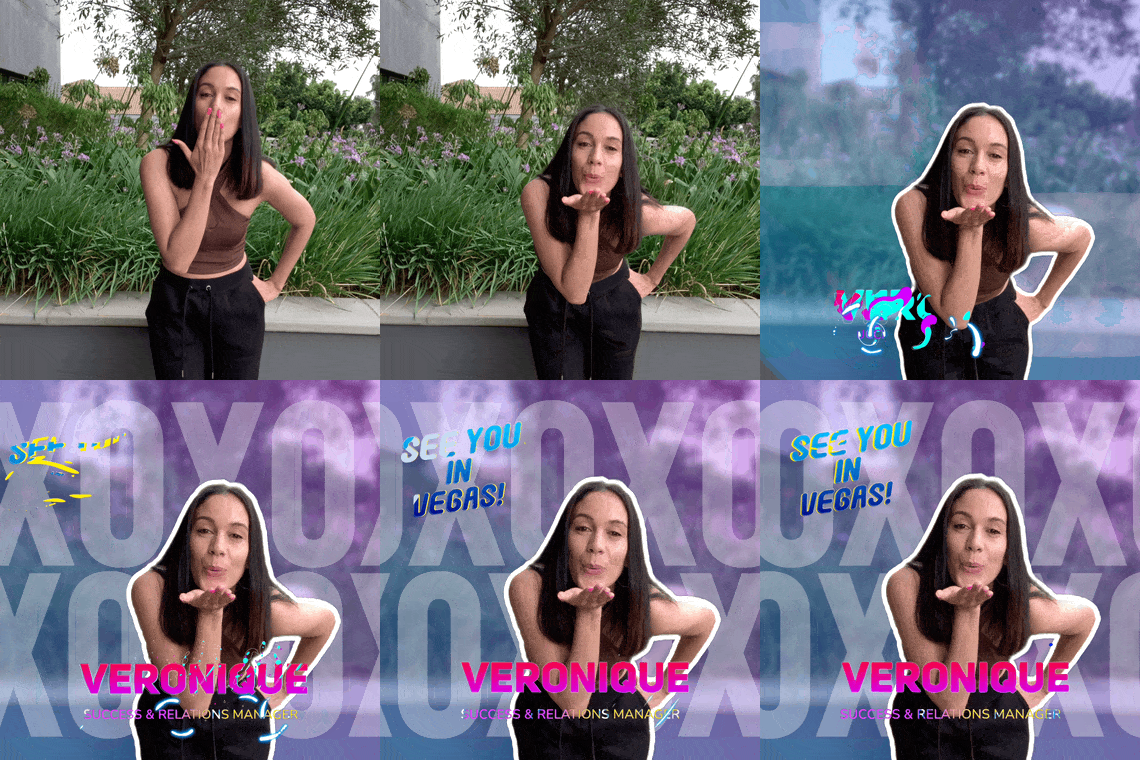
After adding your clips to the timeline, you can click on each clip and add effects to that clip.
The advanced section under each clip allows you to configure the following:
- Changing the direction of the videos via Reverse Playback. This is perfect for 360 booths as you can “reverse” your video without the booth changing direction
- Specifying which part of the recorded video to use with the Playback Range
- Use the Speed Multiplier to speed up or add “slow-mo” to a clip.
- Specify how loud the audio from the recording is in the final video. Set this to 0 to mute the sound. This is an important setting for confessional videos. If you have your own timeline
- Change the video frame position or size of this clip in the final video.
- Upload an overlay that will only be placed over the specific clip.
Spice Up Your Videos with Effects
Most 360 videos use the same old effects: Slow motion, reverse, and speed ramps.
But with Snappic, you can make your videos stand out from the crowd! They have many cool effects you can add to spruce up your 360 videos.
You can build your own custom effects, or choose from a library of preset saved effects. Some examples include:
Filter
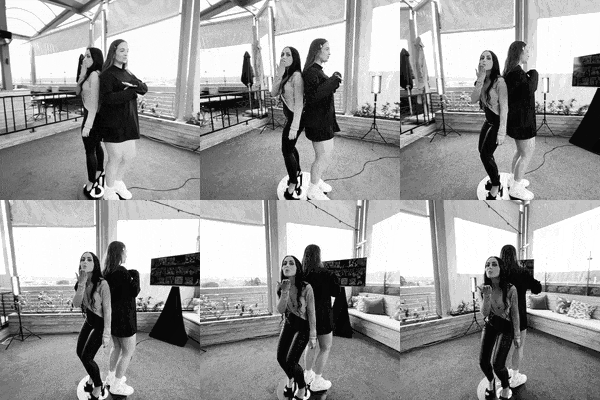
You can add a filter over your clip to change the look of your video. Some of the filter options include: K Dash (perfect for a Glam Booth-style video), Comic, Ink, Sin, Sepia and Beautify.
Hue Rotator

Cycle between rainbow colours to create a cool video effect.
Glitched TV
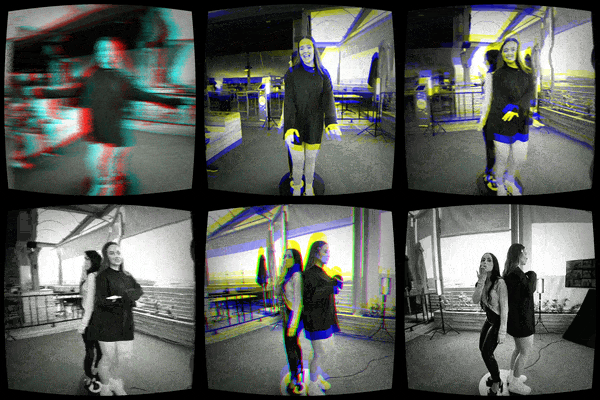
Add a retro old-school tv look and feel with this effect.
AI Segmentation
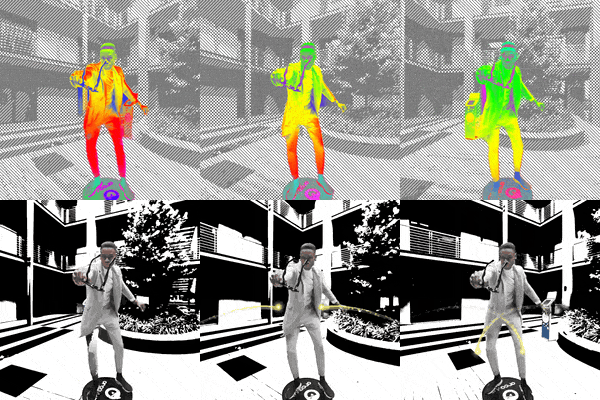
This awesome feature allows you to separate the video’s foreground and background. More info on this feature below.
Alpha Stroke
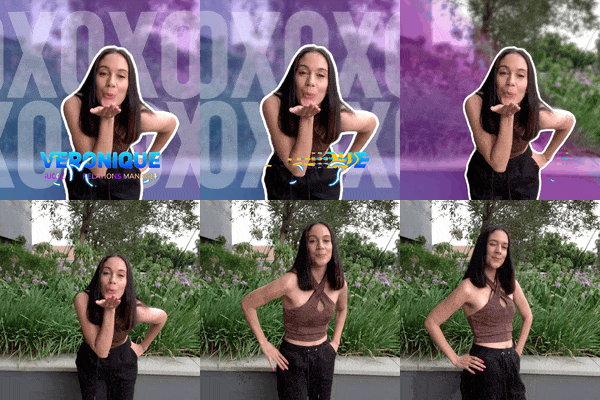
Add an outline to your subject.
Chromatic Abberation
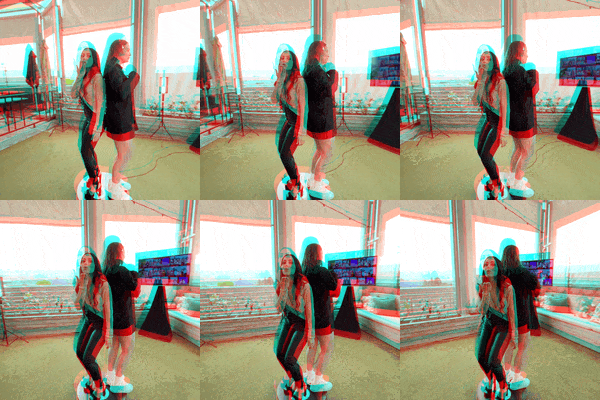
Separates RGB colors to create a trippy effect.
Overlay Library

Add overlay effects to your videos from our comprehensive free library. Effects include confetti, flame effects, flash effects, smoke, and much more.
Change The Game With AI Segmentation
AI segmentation is a game-changing feature exclusive to Snappic. This powerful feature differentiates between the foreground (people) and background in any video and then divides the video into two separate parts.
This allows you to add effects and overlays onto these two separate parts in real-time at your event.
Whether you have a standard video booth or a 360 booth, this revolutionary feature will breathe new life into your videos. AI Segmentation pairs perfectly with 360 videos as it allows you to highlight the guests on the booth.
You can have your guests in black and white, and the background normal or vice versa. Lighten up the holidays with snow as your background. Create a Halloween video with an animated background of scary woods and add a glitch effect to your guests. The combinations are endless.
You can also shrink your guests, add themed animated backgrounds, make guests pop with alpha stroke and freeze frames, create fun dance videos, multiply your guest and so much more! The possibilities are endless with Snappic’s AI Segmentation feature.

Make life easy with Snappic’s Template Library
If you’re just getting started and feeling a bit overwhelmed with creating your own template, don’t stress!
Snappic has a whole library of templates for you to choose from. Pick from our range of 360 video templates and edit them to suit your needs.
Simply click on “Select from Template Library”, choose your desired template and edit it to suit your needs. Choose your resolution, add an overlay and soundtrack, and save!
Revolutionize your 360 booth today with Snappic! It’s time to test out Snappic’s fantastic feature set and VideoFX builder for yourself. All you need to do is chat with their 24/7 live support team by visiting www.snappic.com and starting a conversation.
You can grab yourself a FREE trial, and see why Snappic is the number one photo booth software in the industry.


